
First, apply a thin coat of any glitter polish after a layer of base coat.

2) Use a cream purple color or any color you desire to draw a circle.

3) Next, use a white polish to draw circle around the first circle.


5) Thicken the line, don't worry about the messyness.
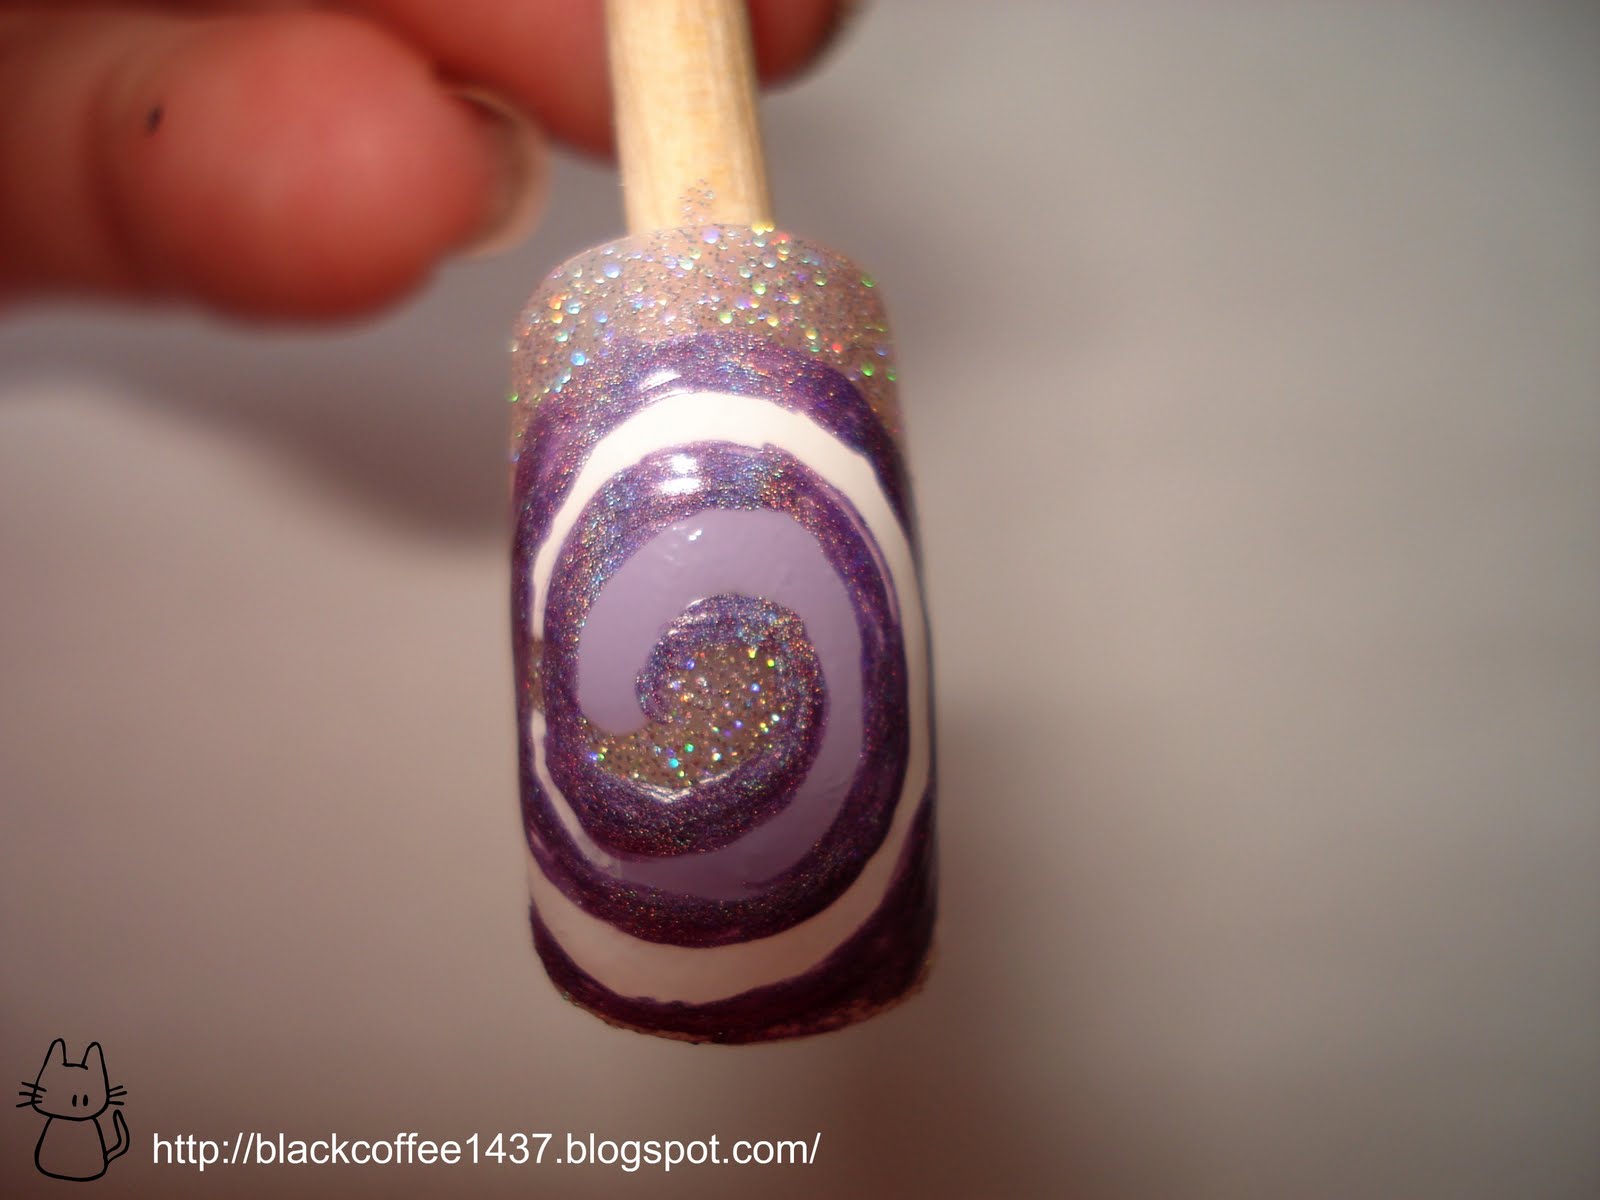
6) The last step is the most critical but most fun part. Use the cream purple and white to randomly add in where you want the swirling effect to be.

7) (Optional) Add a small pink rhinestone in the center of the swirl.

8) (Optional) I added some hexagon glitter on the white part and finally a top coat.

TIPS: It's easier to fill in the color if you start with lightest cream color before using any darker holographic color. And for the best result, wait till the polish is semi-dry before applying the next color to prevent smudging.
Tadah!! You're done!! It doesn't seem that hard, isn't it?? I don't hate water marbling, its just that the cleaning part is messy and wasting nail polish especially my precious holographic nail polish, hehehe (my personal opinion). That's why I try to find the easiest way to achieve the same effect without using water. If you found an easier way to do this, let me know, I would love to try it out!! >.<
Have fun!! *Cheers*
WOW this looks amazing!! I definteley want to give this a try!!
ReplyDeleteKatXoXo
oh my gosh i love it ! i will b trying this .
ReplyDeletethanks for the tutorial! this is awesome! :)
ReplyDeleteThis looks sooo cute! i could have sworn it was water-marbled! good job!
ReplyDeleteHellz to the yes! Nice job :D
ReplyDeleteI have a hard time trying water marbling. Thanks for sharing this tutorial. This looks easier and more fun to do! :)
ReplyDeleteI promise I'll try that sometime... It does look a bit hard, but at least it's easier than real water marbling :'D
ReplyDeleteThis is so cool! :D
ReplyDeleteLovely, thanks for the tutorial!
ReplyDeleteAwesome! Thank you for the tutorial!!! =)
ReplyDeleteThanks so much for this post! I doubt I'll manage a whole mani like this but I might try an accent nail or two. :)
ReplyDeletethis is soooo pretty!! Thanks for the tutorial!
ReplyDeleteThis is great i was never able to do the water marble i will try this one . Thanks
ReplyDeleteOooH~~! I was waiting for this~:D Thank you for sharing how to do this amazing design!
ReplyDeletep.s. I'd LOVE to go back to there on my vacation~!! I just have to save lots...lol!!
Okay - Good - PERFECT!!! Makes the hard look, look pretty straight-forward. Thank you very much!
ReplyDelete